Custom branding on shoes must be decided before the factory cuts patterns, books materials or opens outsole tooling. In footwear production, branding is not a surface detail. It affects the bill of materials, panel cutting, stitching sequence, mold inserts, QC checkpoints, legal marking and sometimes the compliance file.
For sourcing managers and importers buying from China, the main risk is not whether a supplier can add a logo. Most factories can. The real question is whether the selected branding method fits the shoe construction, order quantity, target FOB cost and export market. A woven tongue label on a 600-pair canvas sneaker is routine. A molded outsole logo across a full size run is a tooling project. An embossed shoe logo on leather must be trialed on the actual bulk leather, not on a showroom swatch.
This guide follows the order a development team should use for private label shoe branding: map the logo positions, choose the right process by material, specify labels and legal marks, control embossing and molded logos, issue a factory-ready branding sheet, confirm cost and lead time, then inspect branding before final packing.
The right branding method is the one the shoe material, MOQ, tooling plan and inspection standard can support in bulk production.
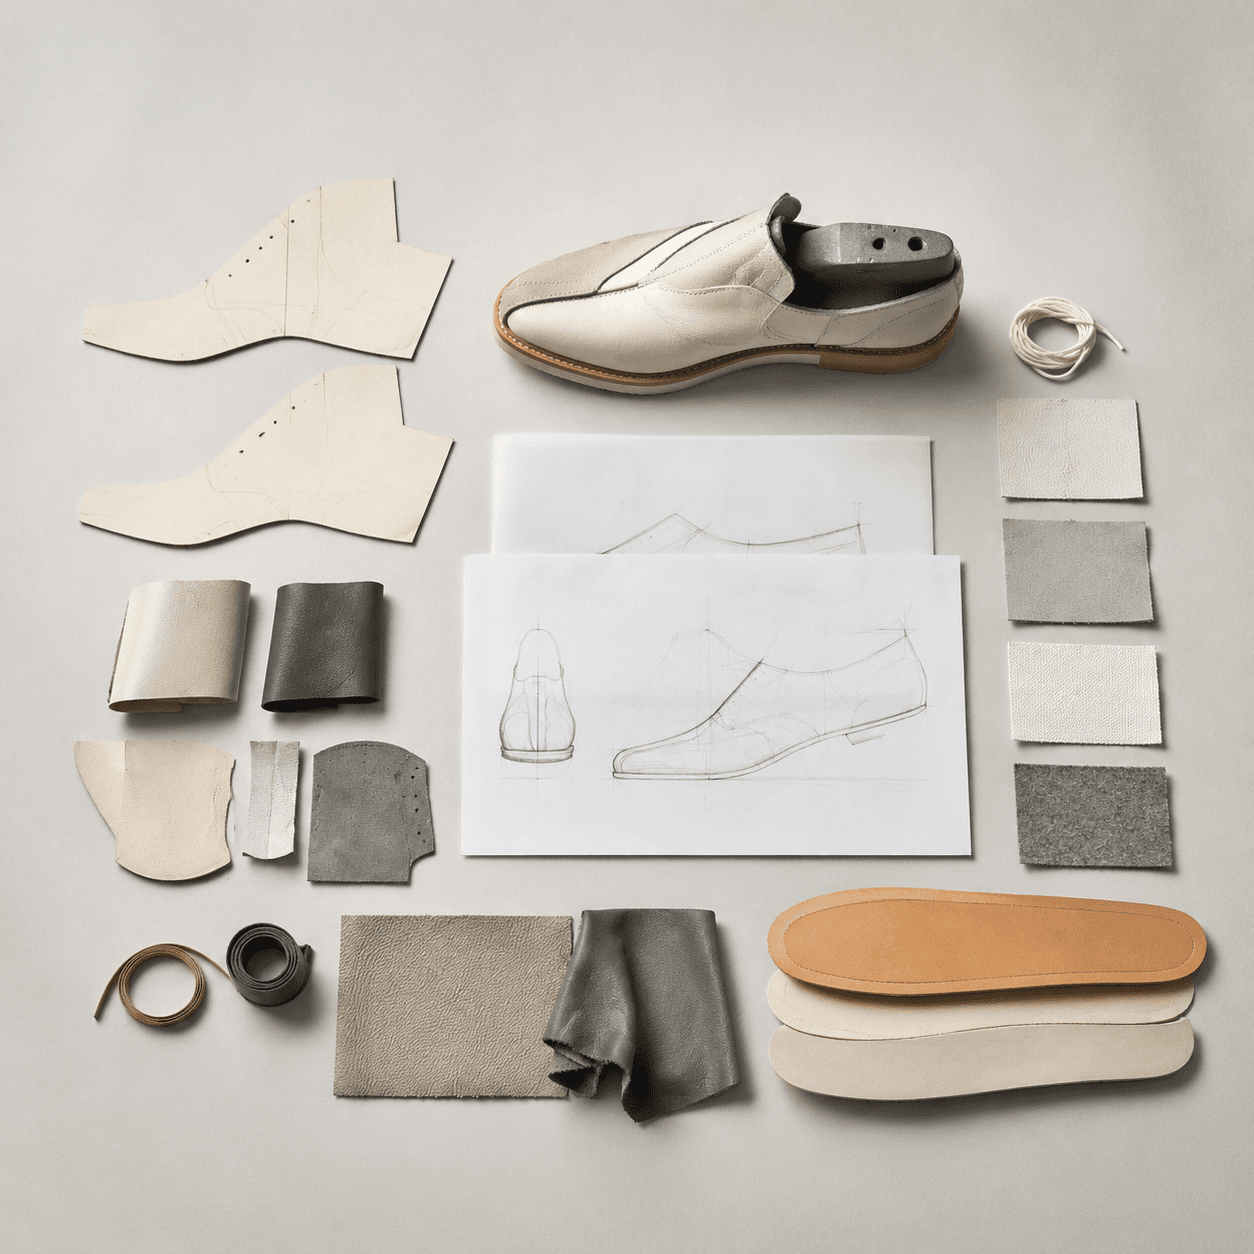
1. Fix the Branding Map Before Sampling
Start with a branding map for the whole shoe and packing set. List every brand mark, size mark, origin mark, material label, hangtag, shoebox mark and carton mark before the first sample is made. On a sneaker, common positions are tongue label, lateral quarter logo, heel tab, sockliner print, outsole bottom logo, shoebox, tissue paper, hangtag and export carton. On leather dress shoes, branding is usually placed on the lining, insole, outsole waist, dust bag and box. On slides and sandals, the practical positions are strap, buckle, footbed, outsole and polybag label.
Factories need this map early because logo placement can change the pattern. A TPU side logo may require a wider panel allowance, backing film or a different stitch line. A woven tongue label changes the tongue stitching operation. A logo on a molded EVA footbed may require a mold insert. If the buyer adds these items after the upper pattern is approved, expect another sample round. Simple label placement changes usually add 3-5 sample days. New branded components, rubber patches or outsole inserts often add 10-20 days before the factory can build a correct pre-production sample.
Keep the branding plan proportional to the order. For 300-500 pairs, use stock outsoles, stock uppers where possible, custom shoe labels and printed sockliners. For 800-1,500 pairs, custom shoeboxes, woven tongue labels, heel labels and basic heat transfers are realistic. For 1,500-3,000 pairs, silicone transfers, rubber badges and outsole logo inserts become easier to negotiate. Full outsole molds or dedicated branded EVA molds are normally justified above 3,000 pairs per style, or when the same tooling will repeat across several seasons.
- Mark every branding position: tongue, quarter, heel, lining, sockliner, outsole, hangtag, shoebox and carton.
- Give each logo a finished size in mm and a fixed reference point, such as 12 mm below the tongue top edge.
- Identify the base material under the logo: PU, microfiber, mesh, knit, canvas, leather, EVA, rubber, TPR or TPU.
- Separate decorative branding from required marks such as size, origin, composition, CE, UKCA, ASTM or EN ISO references.
- Ask which branding positions require pattern changes, cutting dies, molds, reinforcement, heat-press tooling or special machines.
2. Match the Logo Method to Material and Wear Area
Shoe logo customization should be selected by material, flex area and expected abrasion. Smooth PU, full-grain leather, suede, mesh, knit, canvas, molded EVA and rubber all behave differently. For mesh and knit uppers, heat transfer, silicone transfer and embroidery are common. For PU and microfiber panels, screen printing, heat transfer, debossing, TPU badges and stitched patches are practical. For leather, debossing, hot stamping, foil stamping, embroidery on separate patches and lining print are usually more stable than heavy surface transfers.
Heat-transfer logos are common on athletic and casual footwear because they are clean, repeatable and suitable for flat panels before stitching. A one-color PU transfer often adds USD 0.08-0.20 per pair depending on size and film grade. Silicone transfers usually add USD 0.20-0.60 per pair and provide better thickness, elasticity and abrasion resistance. Film proofing normally takes 5-7 days after artwork approval. For difficult colors, allow 7-10 days for Pantone trial matching and approve against a physical strike-off, not a phone photo.
Embroidery works well on canvas, felt, synthetic suede, padded tongues and fabric patches. It is risky on thin PU because dense stitches can pucker the panel or tear the coating. Cost is driven by stitch count, thread type and logo size; many footwear logos fall around USD 0.15-0.70 per pair. Confirm whether embroidery is done before or after cutting. Pre-cut embroidery gives better control on flat panels. Post-cut embroidery can distort small or padded parts.
Screen printing remains the lowest-cost process for flat components such as canvas panels, PU quarter pieces and insoles. One-color printing usually adds USD 0.05-0.15 per pair plus screen setup. It is weak on textured mesh, waxy leather and high-flex vamp areas unless ink adhesion is tested. For export programs, request dry rub, wet rub, flex and tape adhesion tests on the approved bulk material. A print that passes on a lab swatch may fail after lasting heat, steam or carton compression.
Test branding where the shoe actually wears
A forefoot logo bends thousands of times; a heel logo faces trouser abrasion and carton friction; an insole print faces sweat, sock dye, heat and pressure. For 4-6 mm EVA or PU sockliners at 80-120 kg/m3 density, print adhesion can change after compression. Test the printed sockliner after rub and compression, not only as a loose flat sheet. For running and walking shoes, avoid thick transfers on the flex line unless the factory has already passed flex testing on the same construction.
3. Specify Custom Shoe Labels and Legal Marks
Custom shoe labels are the most flexible private label shoe branding option for low and mid-volume orders. A supplier can apply woven tongue labels, printed satin labels, nylon size labels, TPU patches, rubber patches, pull-loop labels and insole labels without changing the whole shoe. Labels also let one brand system run across sneakers, boots, sandals and slippers without opening new outsole molds.
Woven labels give a retail-ready finish but have technical limits. Fine text below about 1.5 mm height often closes up. Gradients, hairlines and tight registered colors should be simplified. A typical woven label MOQ is 500-1,000 pieces per design and colorway, with 5-8 days production after artwork approval. Cost is often USD 0.03-0.12 per label depending on yarn density, size, edge cutting, fold type and backing. For premium tongue labels, ask the label supplier for yarn count and finished GSM if available; many woven tongue labels are around 120-180 GSM equivalent fabric weight.
Printed labels are better for size, origin, material composition and care information. Common bases are satin, nylon tape, cotton tape and heat-transfer label film. Printed label MOQ is often 500-2,000 pieces, with 3-7 days lead time. For EU and US shipments, confirm country-of-origin wording before bulk production. For safety footwear, CE, UKCA, ASTM F2413 or EN ISO 20345 marks must match the certified construction and test report. They cannot be added to a similar non-certified shoe just because the outsole or upper looks alike.
Insole branding needs more control than many buyers expect. Leather insoles often use hot stamping or foil stamping. EVA, PU foam and Ortholite-type sockliners usually use screen printing or heat transfer. A light print on a dark sockliner may need two ink passes or a white base layer. Ask for sweat resistance, dry rub, wet rub and color migration checks, especially when dark socks will contact a light print or white foam.
- Use woven labels for tongue, heel tab, pull loop and visible brand marks.
- Use printed labels for size, origin, composition, care instructions and retailer data.
- Confirm fold type: center fold, end fold, straight cut, loop fold or heat-cut edge.
- Keep woven artwork simple; avoid small text, gradients and very thin strokes.
- Approve label position in mm from seams so bulk stitching can be inspected consistently.
4. Treat Embossing and Molded Logos as Tooling
An embossed shoe logo can look clean and durable, but it should be treated as tooling work, not decoration. Embossing raises the logo above the surface. Debossing presses the mark into the material. Hot stamping adds foil or pigment by heat and pressure. Molded branding forms the logo directly in EVA, rubber, TPU, PVC or TPR. Each method needs a plate, mold insert or dedicated tooling, plus a trial on the actual production material.
On leather uppers, debossing is usually more reliable than raised embossing. Full-grain leather, corrected-grain leather, split leather and coated leather all react differently to heat and pressure. Soft tumbled leather may not hold a sharp edge. Low-grade PU coating can crack or become glossy around the pressed area. Test on the same bulk material, thickness and finish. A supplier swatch from a different batch is not enough for approval.
For outsoles, molded logos need mold planning. If an existing outsole mold accepts a removable logo plate, a small insert may cost USD 80-300 and take 7-15 days. A new outsole mold set can range from a few hundred dollars for one sample size to several thousand dollars for a complete size run with production cavities. Lead time is usually 20-35 days, and longer for multi-density rubber, TPU windows or complex tread patterns.
Molded branding is suitable for EVA slides, clogs, rubber boots, safety footwear and outsole bottoms, but detail must be controlled. Very small raised letters round off during EVA injection. Deep recessed letters can trap rubber flash. Thick TPU logos can create sink marks. For slip-resistant footwear, avoid large smooth logo islands in the tread contact area unless the outsole still meets the target method, such as EN ISO 20344 slip testing or the retailer’s ASTM-based slip requirement.
- 01Send vector artwork in AI, EPS or PDF with all fonts outlined.
- 02Confirm logo depth, raised height and minimum line thickness in mm.
- 03Approve a molded, embossed or debossed material trial before approving full shoes.
- 04Check edge sharpness after flexing, rubbing, lasting heat and carton compression.
- 05Record tooling cost, ownership, storage period and exclusivity in the purchase order.
5. Issue a Factory-Usable Branding Specification Sheet
A branding specification sheet should sit inside the tech pack and be referenced in the purchase order. It must be clear enough for the sample room, material purchaser, stitching line, outsole workshop and QC team to use without interpretation. One product photo with arrows is not enough. The sheet should include artwork file names, logo dimensions, Pantone references, process method, base material, placement points, tolerances and approved sample references.
Use Pantone TCX for textiles and leather where practical, and Pantone C or U for printing and packaging when the supplier works to those systems. Do not expect one Pantone code to look identical on woven yarn, PU ink, rubber, EVA and coated paper. Define acceptable tolerance by component. For controlled printed parts, Delta E below 2.0-3.0 is a workable target if the factory has a color meter. For woven labels and rubber badges, a sealed physical master is usually more reliable because yarn and compound colors have limited matching range.
Placement must use fixed shoe points. A tongue label can be centered and placed 12 mm below the tongue top edge with +/-2 mm tolerance. A heel logo can be centered on the back seam and positioned 18 mm above the outsole topline. A lateral quarter logo should be measured from the collar seam, eye-stay or back counter line, not from a photo. Without fixed reference points, inspectors judge by eye and the factory will treat variation as normal production tolerance.
Add performance and compliance notes. For children’s footwear, confirm restricted substances, small detachable parts and sharp-edge risks on badges. For waterproof shoes, do not stitch labels through membrane zones unless the seam is sealed and tested. For safety shoes, branding must not interfere with toe cap, puncture plate, antistatic or slip performance under EN ISO 20345 or ASTM F2413. For printed parts, state rub, adhesion, migration and sweat-resistance requirements before bulk production starts.
- Artwork: vector files, outlined fonts, Pantone references and JPG preview.
- Placement: dimensions in mm from fixed construction points.
- Process: print, heat transfer, embroidery, woven label, debossing, embossing or molding.
- Tolerance: placement, skew, color, logo size, missing print, loose thread and visible glue.
- Testing: rub, flex, adhesion, migration, sweat resistance and packing compression where relevant.
- Approval: signed PP sample, sealed label sample, outsole trial piece or branded component master.
6. Confirm MOQ, Unit Cost and Lead Time Before Bulk Release
Branding cost includes more than the visible logo. It includes setup charges, component MOQs, trial waste, tooling, sample revisions and sometimes slower line output. A basic branded sneaker with woven tongue label, printed sockliner and branded shoebox may add USD 0.20-0.60 per pair. Add silicone side logos, rubber patches or outsole inserts and the increase can reach USD 0.80-2.00 per pair. New molds, metal badges or special packaging can push the effective cost higher on small orders.
MOQ is controlled by the most restrictive component. A shoe factory may accept 600 pairs per color for a stock outsole casual shoe, but the shoebox supplier may require 1,000-2,000 boxes, the woven label supplier 1,000 labels and the rubber patch supplier 2,000 pieces. For leather footwear, material yield can be the constraint: a branded lining print or exclusive leather color may require one full hide lot. Ask the factory to separate shoe MOQ, label MOQ, box MOQ, outsole MOQ and tooling MOQ in the quotation.
Lead time should also be separated. Simple label and sockliner branding can usually be sampled in 7-15 days. Silicone transfers, rubber patches and metal badges often need 12-25 days. Outsole mold inserts or new branded bottom tooling can require 15-35 days. After PP sample approval and deposit, bulk production is commonly 30-45 days for casual shoes, 45-60 days for leather shoes and boots, and 50-70 days for waterproof or safety footwear that requires tighter material control and extra testing.
Put tooling terms in writing. State who owns logo molds, embossing plates, outsole inserts, metal badge tools and printing screens. Define the storage period, replacement cost and exclusivity. Branded tooling should be restricted to the buyer’s orders. This matters when the supplier also sells similar stock footwear to other importers or uses the same outsole base across multiple customers.
7. Inspect Branding Before Final Packing
Branding defects are expensive to repair after packing. A crooked woven tongue label on 3,000 pairs may require unstitching and can damage the tongue. A weak insole print may require replacement sockliners and delay shipment. A wrong molded outsole logo can make the whole outsole batch unusable. The QC plan should therefore include branding checks at component approval, stitching, lasting, bottoming and final packing.
Ask the factory to check the first 20-50 pairs from the stitching line against the signed PP sample. For larger orders, use an in-line inspection when 10-20% of production is completed. Check logo direction, placement, color, adhesion, label type, legal marks, pair matching and packaging marks. Common failures are simple: wrong label roll, left/right mismatch, upside-down heat transfer, old logo artwork, incorrect size label or carton marks copied from a previous order.
At final inspection, include branding in the AQL checklist. Many importers use AQL 2.5 for major defects and 4.0 for minor defects, but wrong branding should be treated strictly because it affects sellability, customs clearance and retailer acceptance. Missing logo, wrong logo, wrong size label, incorrect country-of-origin mark, false certification mark and unapproved brand placement should be major or critical defects depending on the order.
Keep physical references available. One signed PP sample should stay at the factory, and one should stay with the buyer or inspector. Digital photos do not reliably show embossing depth, foil gloss, woven thread density, ink coverage or sockliner feel. For repeat branded footwear production, keep approved labels, transfers, outsole pieces and shoeboxes in a sample archive so the next order does not drift in color, thickness or placement.
Define rejectable branding defects in advance
Classify defects before production starts. Wrong logo file, missing label, false EN ISO or ASTM marking, incorrect country of origin and severe color mismatch should be rejectable. Placement variation within agreed tolerance may be acceptable. A loose thread around a woven label may be minor if it can be trimmed without weakening the stitch. Clear classification prevents negotiation when the goods are packed and the vessel date is close.
Key takeaways
- Plan custom branding on shoes before sample development so patterns, materials, labels and molds are built around the branding requirements.
- Choose the logo method by material and wear area; heat transfer, embroidery, printing, labels, embossing and molding fail in different ways.
- Custom shoe labels are the lowest-risk option for smaller private label orders, while embossed and molded logos need tooling approval and longer lead time.
- A branding specification must include vector artwork, Pantone references, mm placement, tolerances, process details and physical approval samples.
- Separate shoe MOQ from component MOQ; labels, boxes, rubber patches, outsole inserts and molds often control the real minimum order.
- Inspect branding during production because wrong labels, weak prints, poor embossing and incorrect legal marks are difficult to fix after packing.
SoleForge manufactures athletic & running shoes and casual sneakers under OEM and ODM for brands and importers worldwide. Request a quote with your tech pack or reference pair and we'll reply within one business day.