Understanding how a shoe is built makes you a sharper buyer. You'll ask better questions, spot corner-cutting, and price your product realistically. This walkthrough follows a typical cemented sneaker from concept to packed carton — the most common construction in modern footwear — and notes where other constructions diverge.
Stage 1: Design and the last
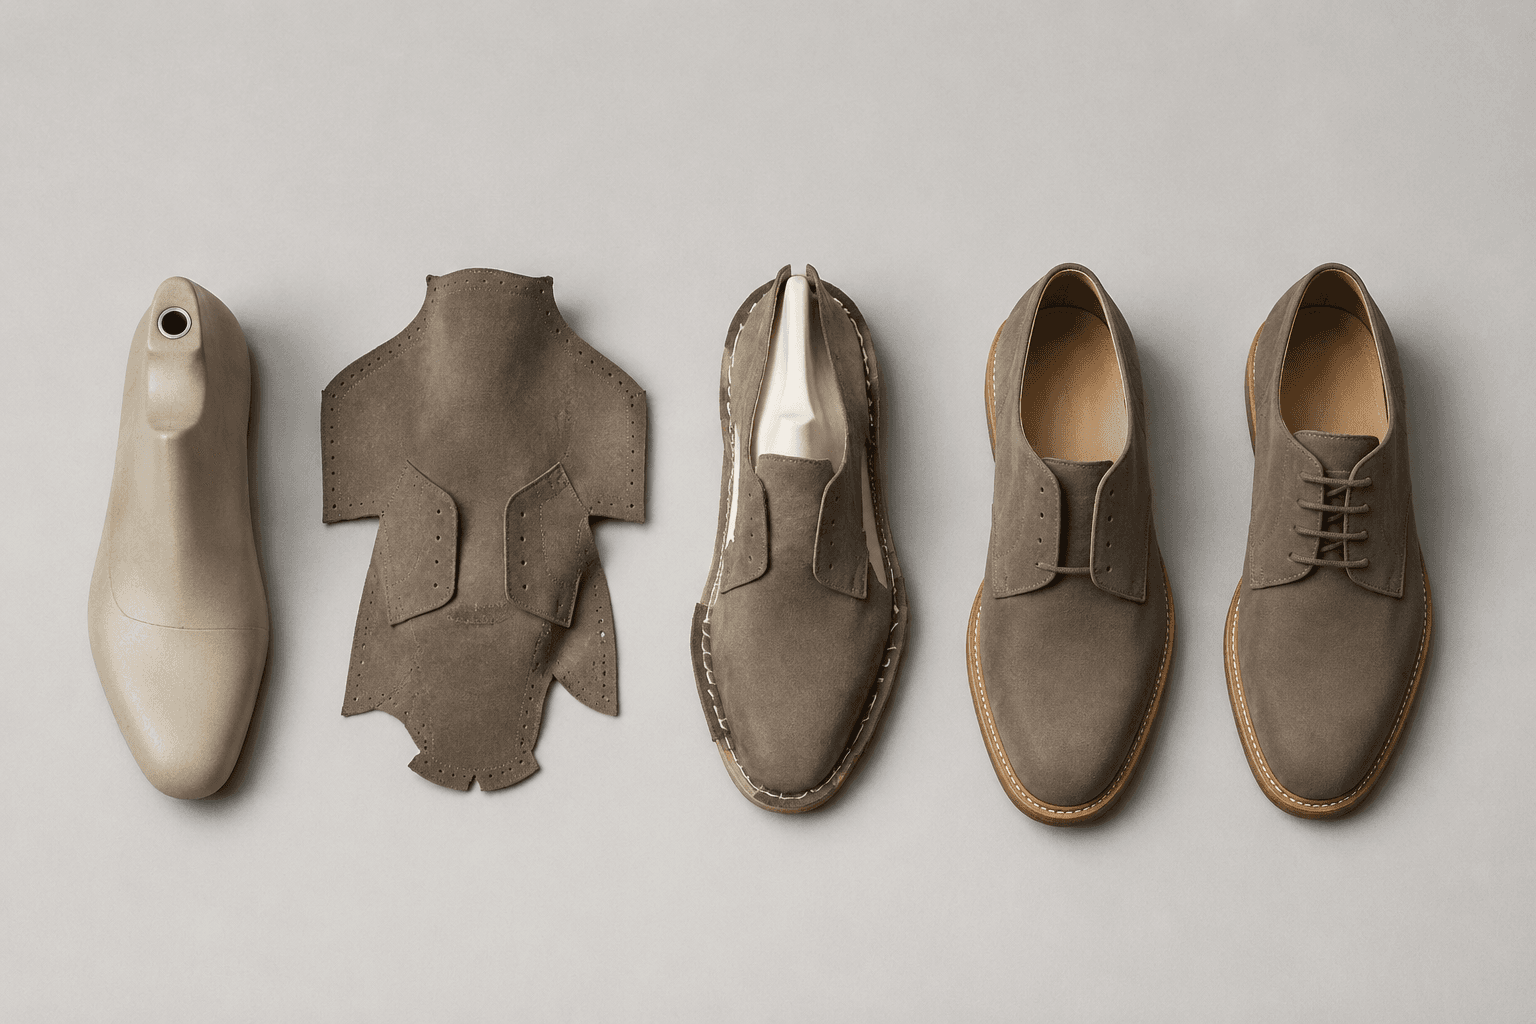
Every shoe is built around a last — a foot-shaped form that defines fit, volume, and silhouette. The last is arguably the most important tool in the factory: get it wrong and no amount of nice materials will save the fit. Designs (sketches, CAD, or a reference pair) are translated onto the chosen last and graded across the size run.
Stage 2: Pattern making and cutting
Technicians break the upper design into 2D pattern pieces, accounting for how flat material wraps a 3D last. Pieces are then cut from the upper material — leather, mesh, knit, or synthetic — by clicking press, laser, or computerized cutter. Material yield at this stage directly affects cost.
Stage 3: Stitching (the upper)
Cut pieces are skived, folded, printed or embroidered, and stitched into a complete upper in the sewing line. This is the most labor-intensive part of shoemaking and where construction quality is most visible — even stitch density, clean edges, and reinforced stress points separate a good upper from a cheap one.
Stage 4: The bottom (outsole and midsole)
In parallel, the sole unit is produced. Midsoles are typically molded EVA or Phylon for cushioning; outsoles are rubber for grip and durability, or a single-piece molded unit. Material choice here is a major cost and performance lever — we break it down in EVA vs. rubber outsoles, and you can explore our footwear materials in depth.
Stage 5: Lasting
The finished upper is pulled tight over the last and shaped — by machine or hand — so it takes the precise 3D form of the shoe. The insole board is attached and the upper's edges are prepared for bonding. Good lasting is what gives a shoe its clean, wrinkle-free shape.
Where constructions differ
- Cement/cold-cement: upper and sole bonded with adhesive — most common, versatile, cost-effective.
- Vulcanized: rubber sole bonded under heat and pressure — the classic canvas-sneaker look.
- Injection (DIP/IP): sole material injected and molded directly onto the upper.
- Goodyear welt / stitch-down: stitched constructions for premium leather footwear.
Stage 6: Bottoming and bonding
The sole and lasted upper are buffed, primed, cemented, and pressed together under heat and pressure to form a permanent bond. Bond strength is a critical QC point — a weak bond is the leading cause of footwear failure in the field, which is why we pull-test bonds during inspection.
Stage 7: Finishing and QC
The last is removed, insoles and laces are fitted, the shoe is cleaned, and finishing touches are applied. Every pair passes inspection against an agreed AQL — checking measurements, appearance, bond strength, and function — before it's boxed. See our full quality control checklist.
Stage 8: Packing and shipment
Pairs are matched, tissue-wrapped, boxed, and cartoned per your packing specification, then palletized for export. From a buyer's seat, the whole cycle runs roughly 30–45 days after sample approval for a standard style.
A shoe is assembled from dozens of components in a precise sequence. Quality is decided long before final inspection — in the last, the pattern, and the bond.
Ready to put a design through this process? Request a quote or explore our footwear product range to see what we build.